French Cooking Techniques
What is cooking technique? A practical method, skill, or art applied to cooking.
Why French cooking techniques? Because that's what they are, it
doesn't just apply to French food in a French restaurant. All of the
skills, techniques, and methods that cooks learn on their way to
becoming a chef are, in fact, French. In the 1890's Escoffier
reorganized restaurant kitchens and developed a codified method of
working and training. Those methods, skills and practices are still in
place to this very day. In fact, every classically trained chef alive
today can trace his or her lineage back to Escoffier.
Good cooking techniques and methods begin with mise-en-place and kitchen knife skills. Excellent knife skills and the practice of mise-en-place can make you a star among your friends and family. Poor technique and methods, well, do I have to say it?
French Cooking Techniques Every Cook Should Know
- How to hold a knife.
- The basic Knife cuts.
- How to cut an onion.
- How to bread food.
- Tempering a sauce.
- Making a pan sauce.
- Folding ingredients together.
How To Hold A Knife
At the cornerstone of French cooking techniques are knife skills.
When you hold a knife you should grasp the knife between your thumb and forefinger just above the handle. On a well constructed knife that is the approximate point of the balance and will allow you to control the knife. Wrap your remaining fingers around the handle and you should be able to comfortably manipulate the blade anywhere you want it to go. With practice it will become an extension of your hand.

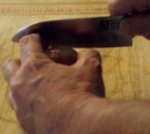
When you are cutting something, anything, hold it firmly with your free hand making certain your thumb and fingers are curled back as mine are, in the picture. This helps to prevent cutting your fingers, rather than the produce.

Knife Cuts

 Brunoise
Cut into tiny cubes - 1/16" x 1/16" x 1/16"
 Fine Dice
Cut food into very small cubes - 1/8" x 1/8" x 1/8"
 Small Dice
Cut food into small cubes - 1/4" x 1/4" x 1/4"
 Medium Dice
Cut into bite sized pieces - 1/2" x 1/2" x 1/2"
 Large Dice
Cut into large squares - 3/4" x 3/4" x 3/4"
 Fine Julienne
Cut into matchsticks - 1/16" x 1/16" x 2"
 Julienne
Cut into double matchsticks - 1/8" x 1/8" x 2"
 Batonnet
Cut into french frys - 1/4" x 1/4" x 2"
 Mince
MinceCut food into very tiny pieces, typically garlic 1/16" or smaller
 Rough Chop
Cut food into random sized pieces
 Chiffonade
Finely cut leafy vegetables or herbs by stacking and tightly rolling the leaves to be cut, then slicing into thin strips
How To Cut An Onion

Cut the root and stem ends off.

Slice the onion in half through its axis.

Remove the skin and the first layer of the onion. That outer layer can be bitter tasting.

Cut slices three-quarters of the way through the onion. If you want 1/4 inch dice make 1/4 inch cuts, etc.

Cut slices along the onion, perpendicular to the previous slices, and the same size. In this case I made 1/4 inch perpendicular cuts.

Slice the onion parallel to its equator. Make cuts that are the same size as the previous cuts. Again, I made 1/4 inch cuts, giving me 1/4 inch dice, or small dice.
Once you cut through the onion you're going to be left with a piece that isn't segmented yet. At that point slice it parallel to its longest surface. Lay the stacked slices down and again slice it along its longest surface. Rotate it 90 degrees and finish dicing the onion.
Breading
Breading is a general term to describe a coating of bread or cracker crumbs, cornmeal, flour, or other dry starchy meal applied to foods the will typically be deep-fried or pan-fried. Breaded items, typically proteins, can also be baked after they are breaded.
To get the best results when you bread something use a 3-step process. Coat the food with flour, dip it in egg, and dredge it in breadcrumbs. Why the 3-step process? The flour sticks to the food, the egg sticks to the flour, and the breadcrumbs stick to the egg.
When you bread anything, get in the habit of using one hand to coat and transfer the food being breaded. That way you'll have one clean hand to work with. Sounds simple, right? You'd be surprised!
 Polenta squares, flour, egg, and breadcrumbs.
First prep your product to be breaded and set up your breading station.
 Polenta square being dredged in flour.
The first step is to coat the polenta, or whatever, in flour.
 Polenta square properly dredged in flour.
This step is the most critical step in breading. If you don't pat or tap off all of the excess flour you are going to get bare spots on your breaded and fried foods.
 Breaded polenta square.
Next, coat the polenta in egg and then dredge it in breadcrumbs.
When you are breading food it is important to not bread more than can be cooked at one time. If you do the breading on the food waiting to be cooked will get soft and the finished product won't be as crisp.
There are other ways to bread food. For example, fried chicken is typically only coated in seasoned flour, though it is usually soaked in some liquid, often buttermilk, then coated in seasoned flour and fried.
Another method of breading is to simply apply a very light coating of flour to the presentation side of proteins, typically fish, to aid in browning. I do this all the time if I am going to pan sear fish. Here, it is especially important to knock off any excess flour. The goal is to apply such a fine layer of flour that no one realizes it is there.
Take a look at my wild salmon recipe for a good example of this technique.
Tempering
Tempering is just a process to bring up the temperature of one liquid or ingredient by adding another warmer ingredient to it. Custards and creams are classic examples of preparations that require tempering. The reason being that if you just add the yolks to the hot cream, or vice versa, the hot liquid, in this case hot cream, will cook the yolks on contact.

When you are tempering something You start out by slowly drizzling a steady stream of the hot liquid, in this cream, into the cold liquid, in this case egg yolks.

As the yolks come up in temperature and the cream loses heat a kind of temperature equilibrium is created. Once about half of the hot liquid is incorporated into the cold liquid you can increase the amount you are pouring. When you get to about three-quarters of the way done, you can stop tempering and just add the liquids together.
Making A Pan Sauce
Have you ever ordered a steak or pot roast in a restaurant and wondered how they made that incredibly rich thick sauce on the meat? Yep, pan sauces.
A pan sauce is any sauce made a la minute, or made to order. Typically, the sauce is made in the same pan that the protein your making the sauce for, was cooked in. Some examples are chicken fried steak and country gravy or seared salmon and a pan beurre blanc, or pot roast and demi-glace.
With pan sauces what goes into the sauce isn't nearly as important as how the sauce is prepared.

Pan sauces typically are a 2-step process. The first is to deglaze the pan scraping up any browned bits on the bottom. Then bring that liquid to a full boil. Continue until the liquid reduces to a thick consistency.

Next, start whisking in cold butter pieces one or two at a time. Depending on the volume and thickness of the liquid you may have to whisk in the butter on or off the heat.

The goal is to emulsify the butter into the sauce to produce a thick tenacious sauce that will not break once it is plated.
If a pan sauce breaks you can bring it together again by placing the pan over the heat and whisking in a little water.
Folding Ingredients Together

Folding is simply the process of combining two or more ingredients together. Typically it is used when the ingredient to be folded in has been whipped as in the case of whipped cream or egg whites.
Erroneously, directions often instruct you to use a whisk to fold ingredients together. Don't! Use a rubber spatula. Go down the sides and come up through the middle. Folding like this takes longer but you lose less volume and air this way, which is the whole point of folding in the first place.
When you are folding an ingredient into other ingredients work in batches folding in a little at a time, and never more than a third of the ingredient at a time. Again, this ensures you will incorporate the maximum amount of air into the recipe, which, again, is the goal.


Tags: french cooking techniques, cooking techniques and methods, kitchen knife skills


Recent Articles
-
Gratinee Of Spinach And Egg
Apr 14, 17 02:19 PM
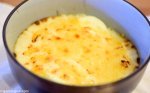 A simple gratinee of spinach and egg with browned garlic.
 -
French Cooking Techniques
Feb 21, 17 05:42 AM
 French cooking techniques and skills every cook should have, including how to butcher a chicken.
 -
Turkey Dressing Recipe Simple Easy And Delicious
Jan 05, 17 06:20 AM
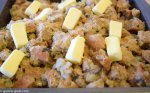 A simple yet delicious turkey dressing recipe that is easy to prepare and sure to please.