High Altitude Baking

High Altitude Baking And Cooking
The issue with high altitude baking and high altitude cooking is that there isn't one solution to the problem. High altitudes pose special challenges because each different location functions like its own micro-climate. So what works in one location may not work in another, even though the locations may share the same altitude.
The best advice is to first try a recipe, that you know works at sea level, and see how it comes out. Then make changes according to the suggestions below. Only make one change at a time and test the recipe until you get the result you're after.
In high altitude climates cooking that uses water as a medium, like pot roast, or for evaporation, like bread, are directly impacted. Water evaporates at a far faster rate the higher you go. This is particularly true for bread baking, though it applies to cooking and other baked goods, as well. Additionally, water boils at a lower temperature the higher you go. So things like pot roast can take as much as twice as long to reach the desired outcome.
The elevation where I live is just over a mile high. Water boils at 202° F not 212° F / 94.4° C not 100° C.
On the top of Mt. Everest water boils at 161° F /72° C, and in Death Valley it boils at 213° F / 100.5° C.
Dry heat methods of cooking, for example, grilling, roasting, or pan searing, are not affected by altitude.
Baking And Cooking At High Altitude - What To Change
Increase oven temperature 15° F / 8° C, when making baking cakes and cupcakes. Evaporation proceeds faster, as does rising. The higher temperature sets the structure of baked goods before they over-expand and dry out. Increase oven temperature 25° F / 14° C, for most other baked goods.
Baking at a higher temperature means baked goods finish faster, so decrease baking time. For every 30 minutes of baking time, check for doneness after 20 minutes, and every five minutes thereafter. For example, if the recipe calls for an hour long bake time, check it after 40 minutes, and every 5 minutes thereafter, until it is done.
Above 3000 feet (900 meters) decrease sugar by 1 tablespoon (15 grams) per cup, and add 1 tablespoon (15 ml) of liquid. For each additional 1000 feet (300 meters) of elevation add another 1-1/2 teaspoons (7-1/2 ml) of liquid.
For example, at 4000 feet (1200 meters), if your recipe calls for 3 cups of sugar and 5 cups of water you would remove 3 tablespoons (45 grams) of sugar, and add 1 tablespoon and 1-1/2 teaspoons (22 ml) of water. Faster evaporation concentrates sugar, which can weaken the structure of what you're baking. The extra liquid helps keep baked goods from drying out too fast.
At 3,500 feet (1050 meters), add 1 tablespoon (9 grams) of flour per recipe. For each additional 1,500 feet (450 meters), add one more tablespoon (9 grams). In some recipes, flour with a higher protein content may yield better results. You can try substituting bread flour or whole wheat flour for all-purpose flour in cookies, for example.
Stews and pot roasts may require additional time to cook. As much as 1-1/2 to 2 times longer than at sea level. In the case of pot roasts you may want to check them, periodically throughout cooking, to make certain the water has not completely evaporated.
At the end of the day high altitude cooking and high altitude baking present their own challenges and those challenges are going to be unique for each location. It may take some time and experimentation to figure out your unique environment. Honestly, it took me a couple tries before I figured out what works for me here.
- King Arthur Flour has some good information on high altitude baking. I've solved some of my high altitude baking problems on that forum.
- The USDA has some good information on cooking at high altitudes.
Tags: high altitude baking, cooking at high altitude, high altitude cooking


Recent Articles
-
Gratinee Of Spinach And Egg
Apr 14, 17 02:19 PM
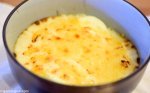 A simple gratinee of spinach and egg with browned garlic.
 -
French Cooking Techniques
Feb 21, 17 05:42 AM
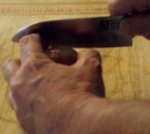 French cooking techniques and skills every cook should have, including how to butcher a chicken.
 -
Turkey Dressing Recipe Simple Easy And Delicious
Jan 05, 17 06:20 AM
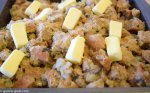 A simple yet delicious turkey dressing recipe that is easy to prepare and sure to please.