A Delicious Sourdough Bread Recipe
Sourdough bread is a labor of love. In the bread baking world it is the pinnacle of bread baking. If you can master sourdough there isn't much else you can't do, bread baking wise. Make no mistake, baking one loaf successfully is not mastering sourdough. Mastery is months down the road, even years, and many many loaves away. Still, once you work out that first loaf it becomes easier.
 That is a beautiful loaf of sourdough bread.
I would love to tell you that this is my first attempt but I'd be lying. The truth is I started working on sourdough when we were back in Albuquerque. For me, I had one problem after another. Either it didn't rise right, or it would rise fine and proof well, then it would deflate in the oven and I ended up with hard dense loaves. Seriously, everything that could go wrong did.
This is the reason for not attempting sourdough if you've never baked any bread before. You wouldn't try ascending K2 if you've never climbed a mountain before, Right?
So, how did I figure it out? Well I got out my bread baking bible and read everything there was on sourdough. Then I mounted that steed and gave it another try.
If you want to try a wonderful variation on sourdough take a look at my Blue Cheese Walnut Sourdough Bread at the end of this post.
How To Make Sourdough Bread

Ingredients for the sourdough bread recipe: flour, salt, sugar, and starter - that's it!

In a small bowl combine the flour from Day 2, the sugar, and the salt. Whisk to thoroughly combine everything.

Add the flour mix to the dough from Day 1. Using a wooden spoon stir until the dough comes together in a shaggy mass.

Lightly coat a bowl with spray oil and form into a boule. Place the dough into the bowl, lightly coat the top of the dough with spray oil and cover the bowl with film.

Once the dough has risen, Gently and without degassing it too much,
divide the dough in half and form it into two loaves.
Transfer the loaves to a parchment lined sheet pan and lightly spray the
tops with spray oil.

Once the
dough has proofed, make a few slits across the top using a razor blade.
Spritz the dough with water and immediately pop it into the oven.
 Beautiful Sourdough Bread.
Remove from the oven and transfer to a wire rack to cool.

Look at the holes in the crumb, that's what you're after.

The images on this page are the same recipe but two different batches. They came out very different looking because I proofed the one above in a bowl lined with a kitchen towel.
First I lined the bowl with the towel, then I sprayed it heavily with spray oil, then I dusted it flour. When you do this the flour and oil mix and stick to the dough.
The Sourdough Bread Recipe
- Yield: 1 large or two small loaves
- Prep Time: 2 days
- Cook Time: varies but about 30 minutes
Ingredients
Day 1
- 225 grams / 8 ounces fed sourdough bread starter
- 355 milliliters / 12 ounces water
- 220 grams / 7.75 ounces all purpose flour
- 140 grams / 5 ounces bread flour
Day 2
- Dough from Day 1, above
- 127 grams / 4.5 ounces all purpose flour
- 113 grams / 4 ounces bread flour
- 10 grams / 1 tablespoon sugar
- 13 grams / 2 -1/4 teaspoons salt
- Spray olive oil
Method
Day 1
- Pour off 225 grams / 8-1/2 ounces of fed starter into a large mixing bowl, glass or ceramic works great here. Add the flours to the starter along with the water. Stir well until all of the flour is incorporated and there are no lumps of flour. You should have a nice smooth dough with the consistency of a thick batter.
- Allow this mixture to rest on your counter top for about 4 hours. You should see quite a bit of activity, bubbles breaking the surface and the whole thing should have risen to double its volume.
- Place the dough in the refrigerator and rest for 12 hours.
Day 2
- Remove the dough from the refrigerator and allow it to come up to room temperature, about an hour or so before you are ready to make the bread.
- In a small bowl combine the flour from Day 2, the sugar, and the salt. Whisk to thoroughly combine everything.
- Add the flour mix to the dough from Day 1. Using a wooden spoon stir until the dough comes together in a shaggy mass. Let the dough rest, covered with a clean kitchen towel for 10 minutes to hydrate the flour.
- Start kneading the bread. At first the dough may seem a little dry, and it may be difficult to incorporate all of the flour. Just keep kneading until it comes together into a silky dough.
- Lightly coat a bowl with spray oil and form into a boule. Place the dough into the bowl, lightly coat the top of the dough with spray oil and cover the bowl with film. Allow the dough to rise until it is doubled in volume, depending on the strength of your starter.
- Preheat your oven to 450° F, and place a pie pan half full with warm tap water on the lower rack.
- Once the dough has risen, Gently and without degassing it too much, divide the dough in half and form it into two rectangular loaves. Transfer the loaves to a parchment lined sheet pan and lightly spray the tops with spray oil. Lay a piece of film loosely over the tops and allow the dough to rise until almost doubled in volume.
- Once the dough has proofed, make a few slits across the top using a razor blade. Spritz the dough with water and immediately pop it into the oven. Be aware, the dough is going to deflate a little when you do this. Just be as gentle as possible and get it into the oven as quickly as possible.
- Bake until the bread is browned on top and the internal temperature reaches 205° F.
- Remove from the oven and transfer to a wire rack to cool. Allow the bread to completely cool to room temperature. Remember bread continues cooking after it comes out of the oven.
Notes
- After pouring off the starter for this sourdough bread recipe, you need to feed the mother starter again. Then you can store it back in the refrigerator.
- Fed starter is starter that has been fed about 4 hours prior to using it. It should be all bubbly and frothy when you are ready to make the dough for Day 1.
- When sourdough is rising it can take from 2 to 5 or 6 hours to rise. It depends a great deal on the strength of your starter and the ambient temperature in your kitchen. These loaves took 2 hours to rise and an hour to proof. But, my kitchen temperature is 88° F and the humidity is 81%. In addition I fed my starter for two and a half Days prior to starting the dough, so that it would be nice and strong.
- Before I preheat my oven I place an aluminum pie pan about half full of water onto the lower rack. Once the oven preheats the pan will be generating steam, that's good.
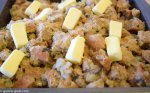
Blue Cheese Walnut Sourdough Bread Recipe Variation
 Blue cheese walnut sourdough bread recipe.
Additional Ingredients
- 4 ounces blue cheese, crumbled
- 4 ounces walnuts, toasted and chopped
Method
- Nothing about the basic recipe changes. The only difference is that after the first rise you are going to punch down the dough. Then divide the dough in half and form each half into a rectangle about a half-inch thick.
- Next you are going to sprinkle each loaf with 2-ounces of blue cheese and 2-ounces of chopped walnuts. Lightly press the walnuts and cheese into the dough.
- Next roll each rectangle into a loaf and transfer to a parchment lined sheet pan to finish proofing.
- Bake as directed in the above recipe.


In the images above you can see where the blue cheese caramelized on the outside of the loaves, it's just beautiful and really delicious.


Recent Articles
-
Gratinee Of Spinach And Egg
Apr 14, 17 02:19 PM
 A simple gratinee of spinach and egg with browned garlic.
 -
French Cooking Techniques
Feb 21, 17 05:42 AM
 French cooking techniques and skills every cook should have, including how to butcher a chicken.
 -
Turkey Dressing Recipe Simple Easy And Delicious
Jan 05, 17 06:20 AM
 A simple yet delicious turkey dressing recipe that is easy to prepare and sure to please.